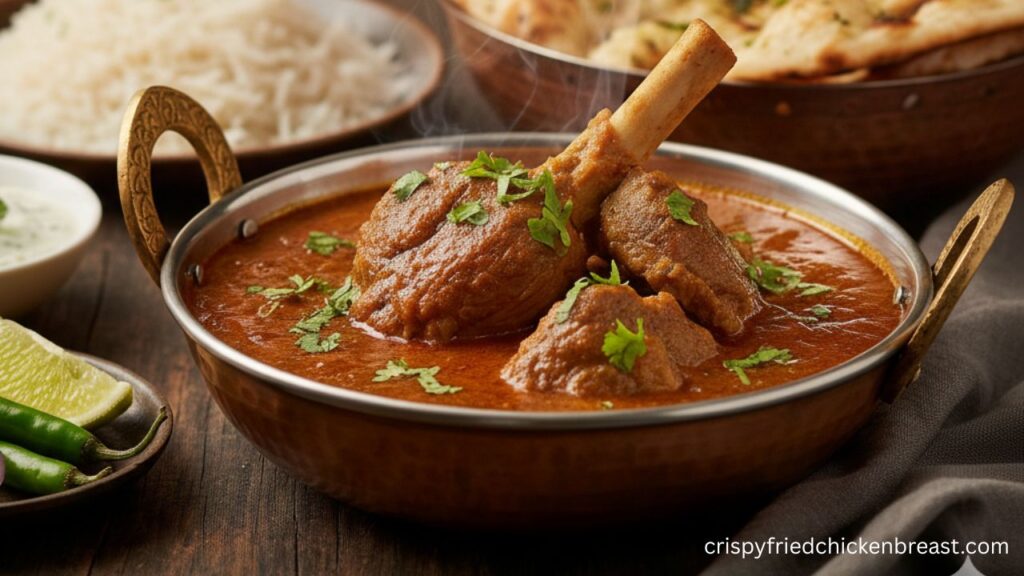
There is nothing quite like a bowl of slow-cooked, tender lamb curry. Whether you call it Mutton Curry or Lamb Curry, the secret to a world-class curry lies in the balance of spices and the “Bhuna” (sautéing) process.
In this guide, you will learn how to make a rich, flavorful lamb curry that is better than takeout. We’ve included methods for both a traditional Dutch oven and a quick Pressure Cooker/Instant Pot.
Why This is the Only Lamb Curry Recipe You Need
Most online recipes are either too “Westernized” (adding apples or rosemary) or too complicated for a weeknight dinner. This recipe hits the sweet spot:
- Authentic Flavors: Uses real ginger, garlic, and yogurt for a thick, velvety gravy.
- Fork-Tender Meat: We share the secret to making sure your lamb never turns out chewy.
- One-Pot Meal: Fewer dishes, more flavor.
- Diet Friendly: Naturally Gluten-Free and can be made Dairy-Free.
Ingredients You’ll Need
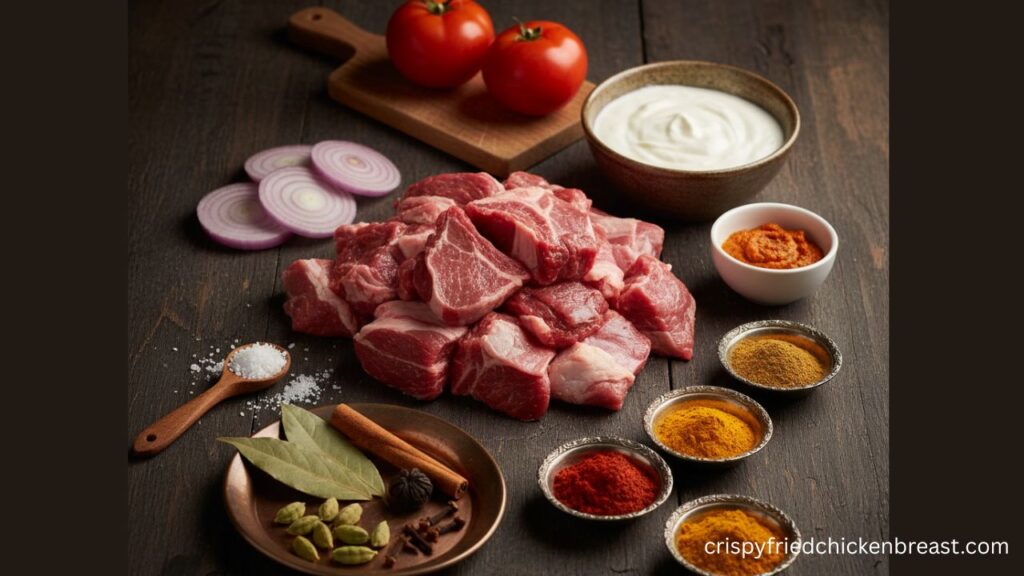
1. The Meat
- 2 lbs (1kg) Lamb Shoulder or Leg: Cut into 1.5-inch chunks. (Pro tip: Use bone-in meat for a deeper, richer broth flavor).
2. The Aromatics & Base
- 3 Large Onions: Finely sliced (Yellow or Red onions work best).
- 2 Tbsp Ginger-Garlic Paste: Fresh is always better than bottled.
- 1 Cup Fresh Tomato Puree: About 2-3 medium tomatoes.
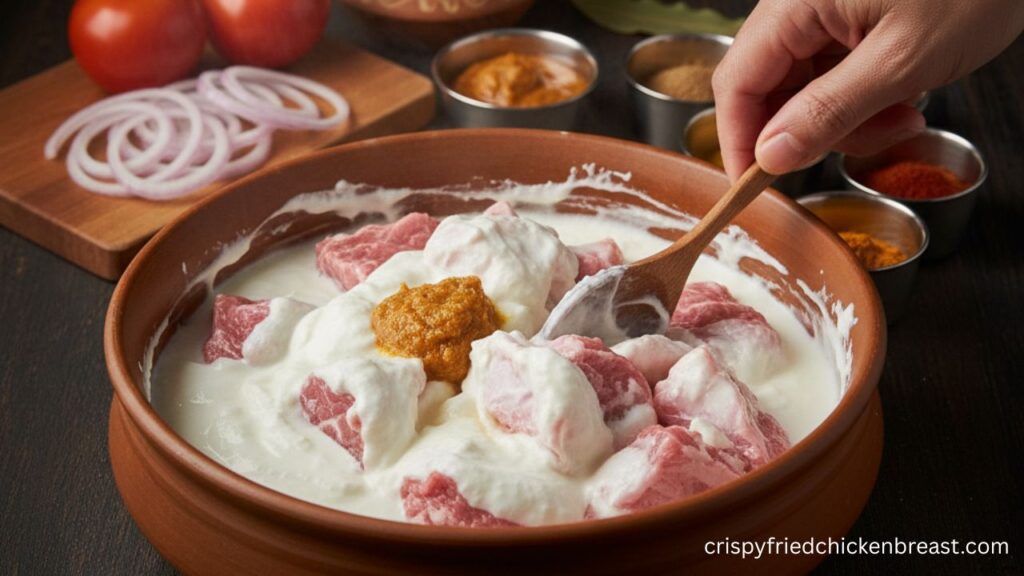
- 1/2 Cup Plain Yogurt (Whisked): This provides the “tang” and helps tenderize the meat.
3. The Whole Spices (The Secret to Fragrance)
- 2 Dried Bay Leaves
- 1 Stick of Cinnamon
- 4 Green Cardamoms
- 1 Black Cardamom (Adds a smoky depth)
- 4-5 Cloves
4. The Ground Spices
- 2 tsp Kashmiri Red Chili Powder: (For that vibrant red color without too much heat).
- 1 Tbsp Ground Coriander
- 1 tsp Ground Cumin
- 1/2 tsp Turmeric Powder
- 1 tsp Garam Masala: (Added at the very end).
- Salt to taste
Step-by-Step Instructions
Step 1: Marination (Optional but Recommended)
In a bowl, mix the lamb with half of the ginger-garlic paste, a pinch of salt, and the yogurt. Let it sit for at least 30 minutes. This softens the fibers of the meat.
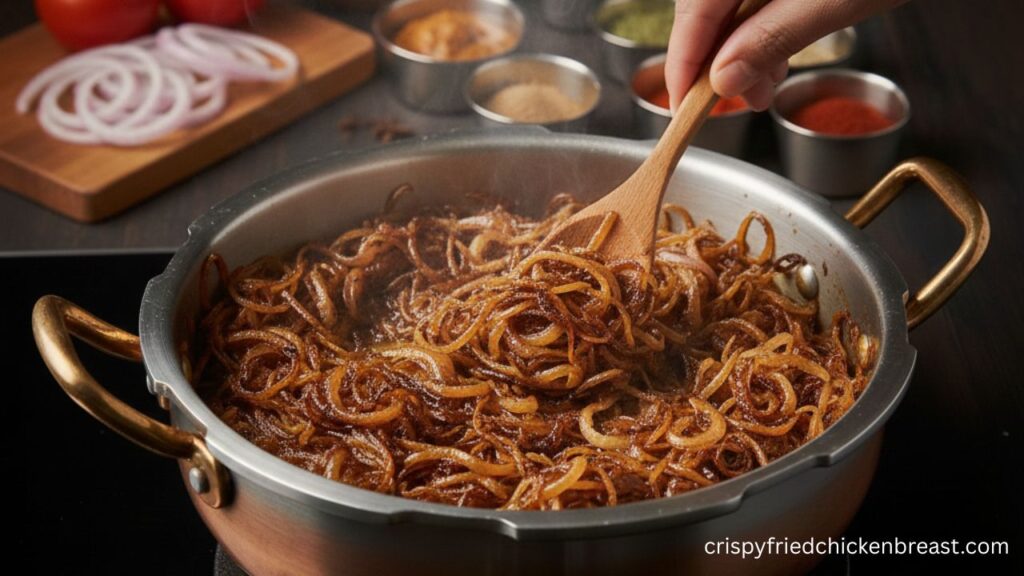
Step 2: Searing the Spices and Onions
Heat 3 tablespoons of oil (or Ghee) in a heavy-bottomed pot or pressure cooker. Add the whole spices (bay leaf, cinnamon, cardamom). Once they sizzle and release their aroma, add the sliced onions.
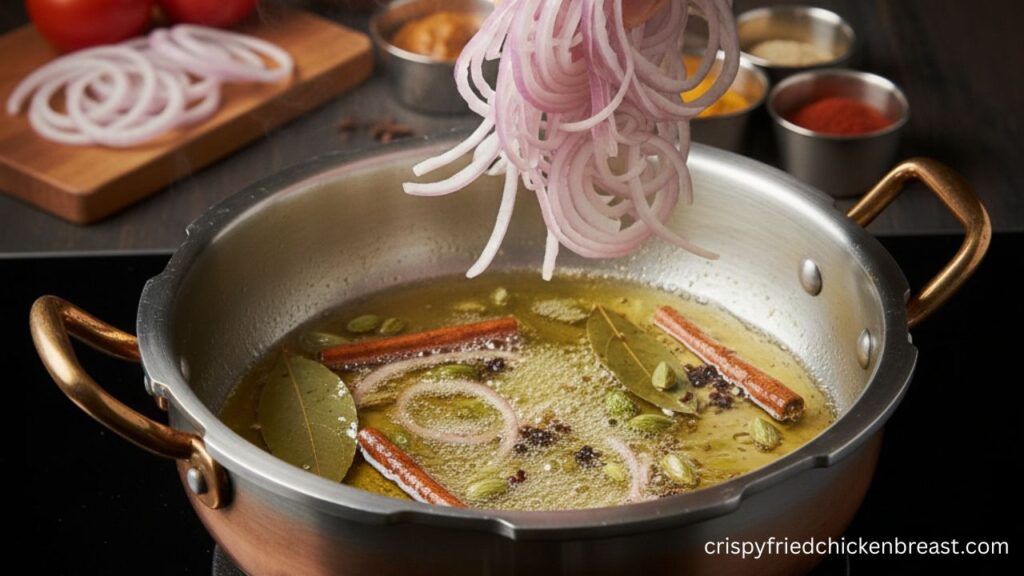
The Golden Rule: Fry the onions on medium heat until they are a deep golden brown. This is the foundation of your curry’s color and sweetness.
Step 3: The “Bhuna” Process
Add the remaining ginger-garlic paste and sauté for 2 minutes. Add the marinated lamb. Increase the heat to high and sear the meat until it changes color from pink to brown.
Now, add the ground spices (except Garam Masala) and the tomato puree. Sauté this mixture for 8–10 minutes.
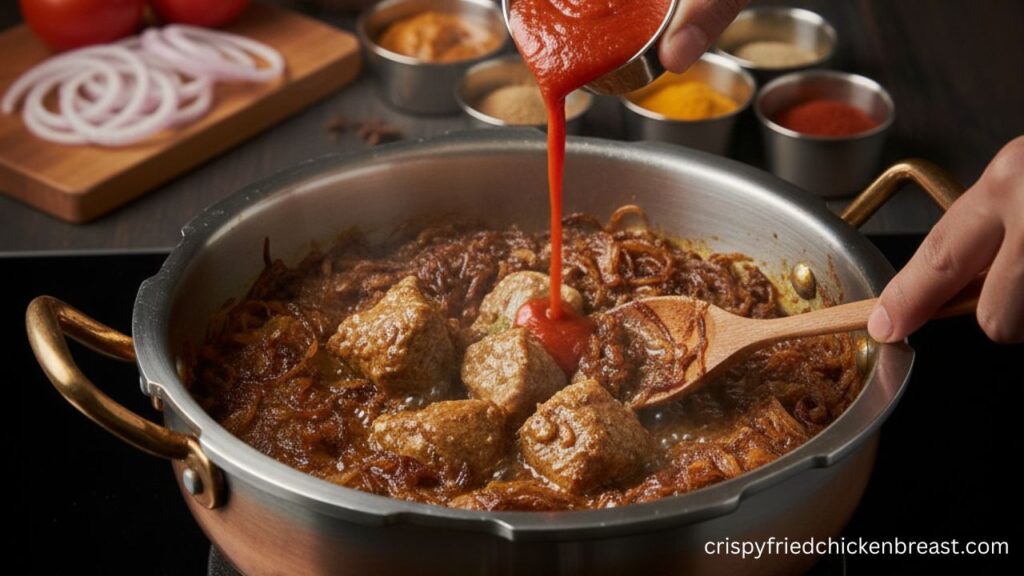
Success Tip: You know it’s ready when the oil starts to separate from the edges of the masala. This is called “leaving the oil” and it ensures the raw smell of spices is gone.

Step 4: Slow Cooking vs. Pressure Cooking
- Stovetop/Dutch Oven: Add 2 cups of warm water. Cover and simmer on low-medium heat for 1.5 to 2 hours. Check occasionally to ensure there is enough liquid.
- Pressure Cooker / Instant Pot: Add 1.5 cups of water. Close the lid and cook for 6–8 whistles (or 20 minutes on high pressure in an Instant Pot). Let the pressure release naturally.
Step 5: The Finishing Touch
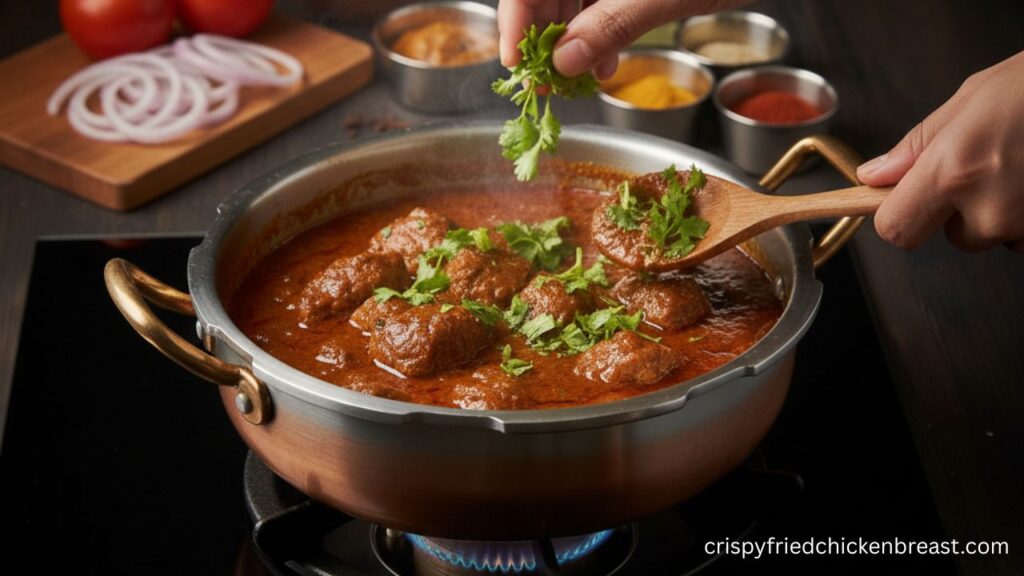
Once the meat is fork-tender, stir in the Garam Masala and a handful of freshly chopped cilantro (coriander leaves). If the gravy is too thin, simmer it uncovered for a few minutes until it reaches your desired thickness.
Pro-Tips for the Best Lamb Curry
- Don’t Rush the Onions: If your onions are pale, your curry will be pale and sweet. If they are burnt, it will be bitter. Aim for “dark chocolate” brown.
- Warm Water Only: Always add warm water to the pot. Adding cold water shocks the meat and can make it tough.
- The Fat Content: Don’t trim all the fat off the lamb. A little fat is necessary to give the gravy that “restaurant-style” silkiness.
- Resting Time: Like a good steak, lamb curry tastes better after resting for 15-20 minutes. Even better? It tastes amazing the next day!
Storage and Freezing
- Fridge: Store in an airtight container for up to 4 days.
- Freezer: This curry freezes beautifully for up to 3 months. Thaw overnight in the fridge and reheat on the stovetop. You may need to add a splash of water when reheating.
Frequently Asked Questions (FAQs)
Q: Can I use Beef instead of Lamb?
Yes, this recipe works perfectly with beef chuck or goat meat. Just adjust the cooking time as beef may take longer to soften.
Q: How do I make it spicier?
Add 2-3 slit green chilies during the “Bhuna” process or increase the amount of Cayenne pepper.
Q: What should I serve with Lamb Curry?
This curry pairs beautifully with:
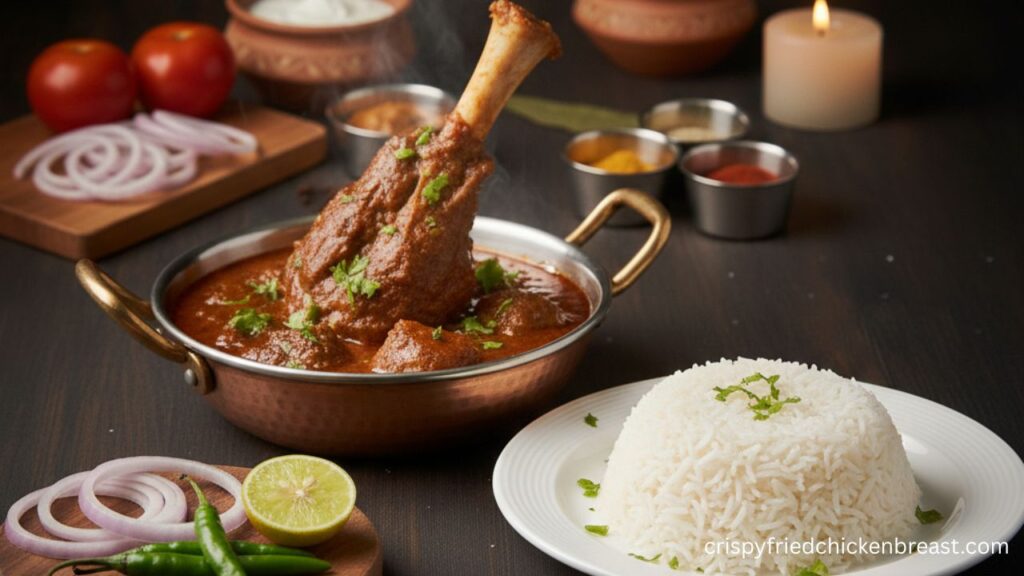
- Basmati Rice: To soak up the rich gravy.
- Garlic Naan: Perfect for scooping up the tender meat.
- Kachumber Salad: A simple mix of cucumber, tomato, and onion with lemon juice to cut through the richness.
-
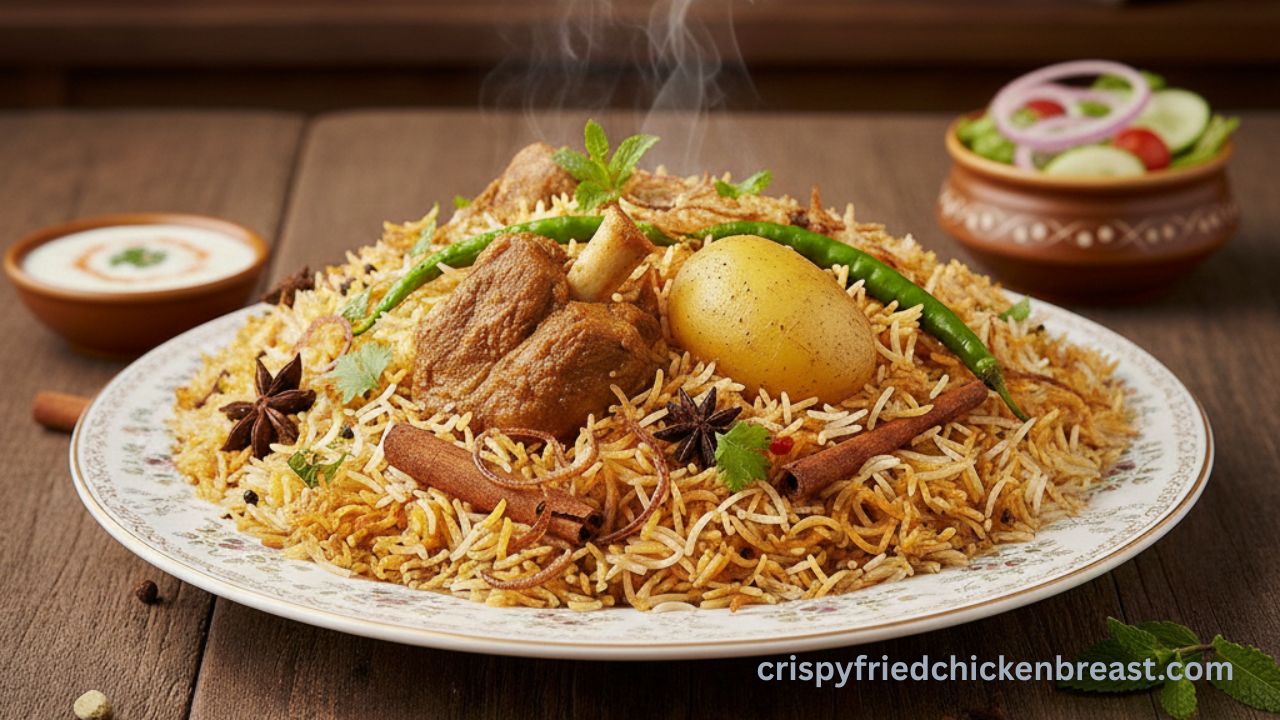
Authentic Karachi-Style Spicy Mutton or Lamb Biryani Recipe
Karachi’s biryani is renowned worldwide for its bold spiciness and rich flavors. What sets Karachi-style biryani apart is its unique […]
-
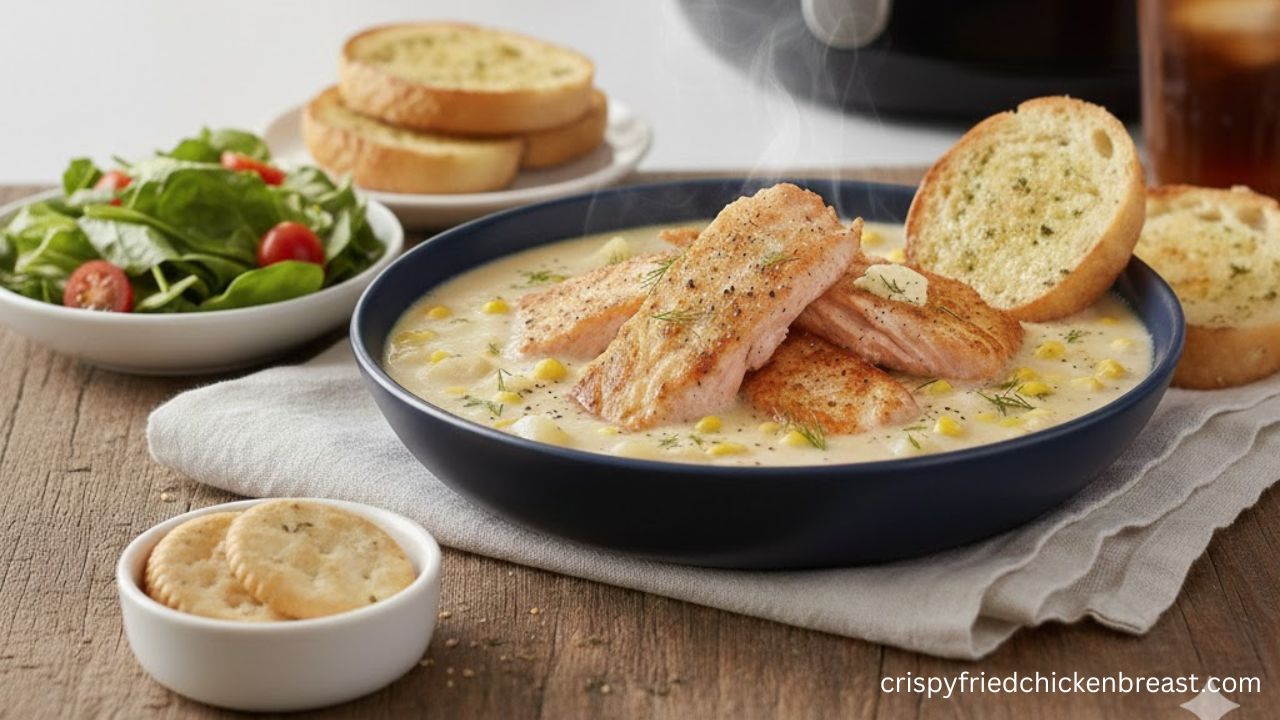
Easy Air Fryer Fish Chowder: The Best 20-Minute Comfort Food
American food is all about comfort. When you think of a cold evening in New England or a family dinner […]
-
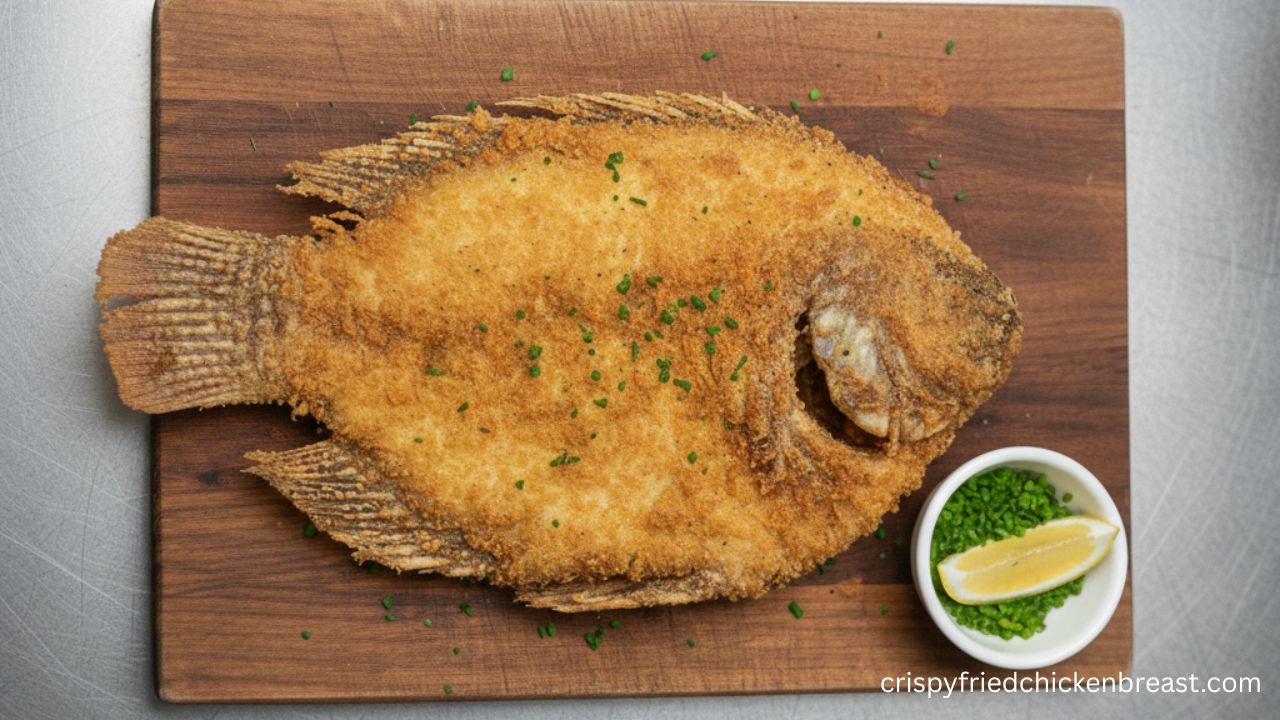
Crispy Fried Tilapia Recipe (Easy, Golden & Crunchy Fish)
Crispy Fried Tilapia is one of the easiest and most loved fish recipes in the United States. It is known […]