Let’s be honest: cooking Pan-Fried Chicken Breast sounds easy, but making it actually delicious is an art. Most people end up with a piece of meat that’s either burnt on the outside or dry and rubbery on the inside.
If you’ve struggled with dry chicken, this guide is for you. We are going to master the Pan-Searing Technique a method that locks in juices, creates a golden-brown crust, and takes less than 20 minutes from start to finish. Whether you’re meal prepping for the week or cooking a quick family dinner, this is the only recipe you’ll ever need.

Why This Pan-Fried Chicken Recipe Actually Works
Most recipes tell you to just “fry it.” We focus on the science of juiciness. By combining high-heat searing with butter basting and proper resting, we ensure that every bite is tender.
- No Fancy Equipment: Just a simple skillet/pan.
- Budget-Friendly: Uses basic pantry spices.
- Versatile: Use it in salads, pastas, tacos, or as a main dish.
- Quick: Faster than ordering takeout!
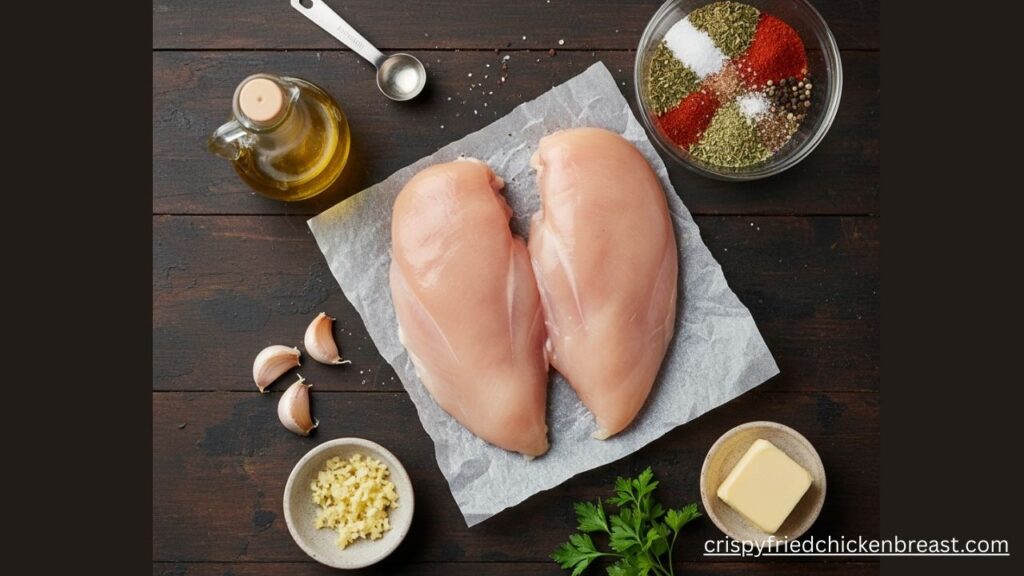
The Ingredients: Simple Staples, Big Flavor
To get that restaurant-quality sear, you need the right balance of fats and spices.
1. The Protein
- 2 Boneless, Skinless Chicken Breasts: Look for pieces that are fresh and plump. If they are very thick, we will show you how to prep them below.
2. The High-Heat Fat
- 2 tbsp Cooking Oil: Use an oil with a high smoke point like Canola, Avocado, or Grapeseed oil. Avoid extra virgin olive oil for searing as it can turn bitter at high heat.
3. The “Flavor Bomb” Seasoning
Mix these in a small bowl:
- 1 tsp Garlic Powder: For that savory depth.
- 1 tsp Smoked Paprika: Gives a beautiful golden color and a hint of wood-fire flavor.
- 1/2 tsp Onion Powder: Adds subtle sweetness.
- 1/2 tsp Dried Oregano or Thyme: For an earthy aroma.
- 1/2 tsp Salt & 1/4 tsp Black Pepper: Essential for bringing out all flavors.
- Optional: A pinch of Cayenne pepper if you like a little kick.
4. The Finishing Touch (Garlic Butter)
- 2 tbsp Unsalted Butter: For richness and moisture.
- 3 Garlic Cloves: Crushed or minced.
Step-by-Step Instructions: Mastering the Sear
Step 1: Prep for Uniformity
Chicken breasts are usually uneven thick at one end and thin at the other. This causes the thin part to dry out before the thick part is cooked.
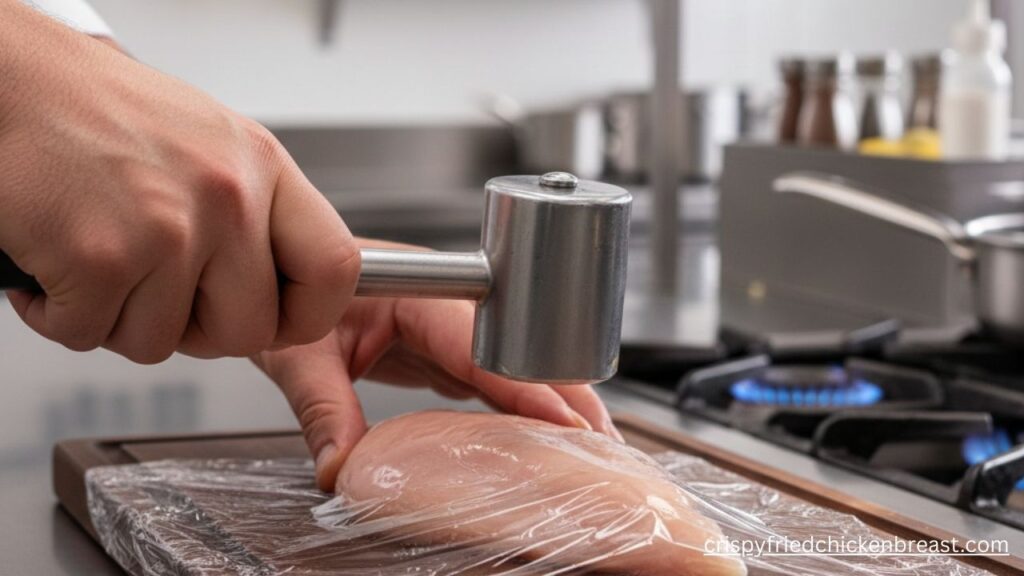
- The Fix: Place the chicken between two sheets of plastic wrap. Use a meat mallet or a heavy rolling pin to gently pound the thickest part until the whole breast is an even 1-inch thickness.
Step 2: The “Dry” Rule
Take a paper towel and pat the chicken breasts completely dry.

- Why? Moisture is the enemy of a good sear. If the chicken is wet, it will steam instead of fry, and you won’t get that golden crust.
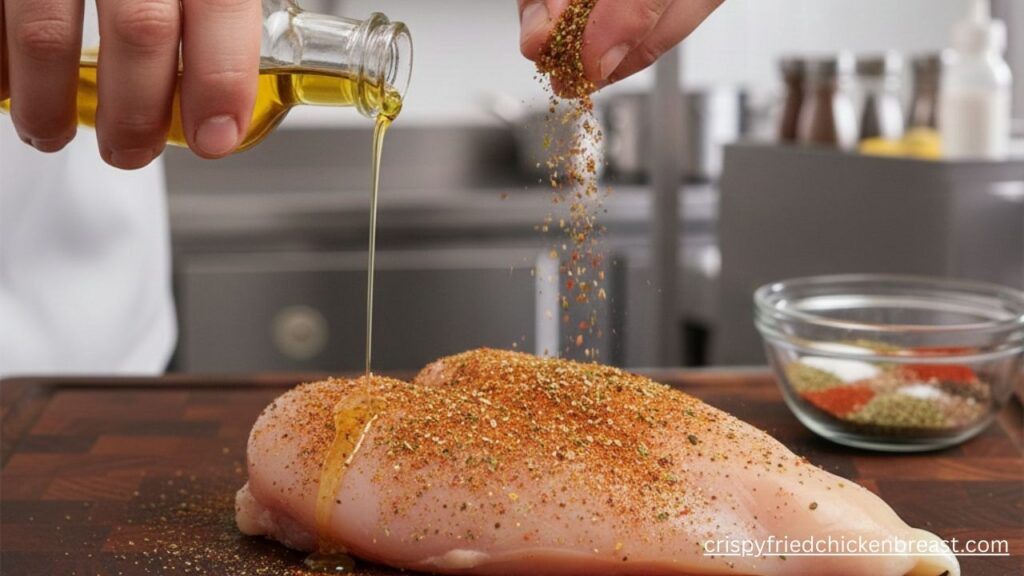
Step 3: Seasoning
Drizzle a tiny bit of oil on the chicken, then rub your seasoning blend generously on both sides. Press the spices into the meat so they stick.
Step 4: The Searing Process
Heat your skillet over medium-high heat. Add the oil. Once the oil is shimmering (almost smoking), carefully place the chicken in the pan.
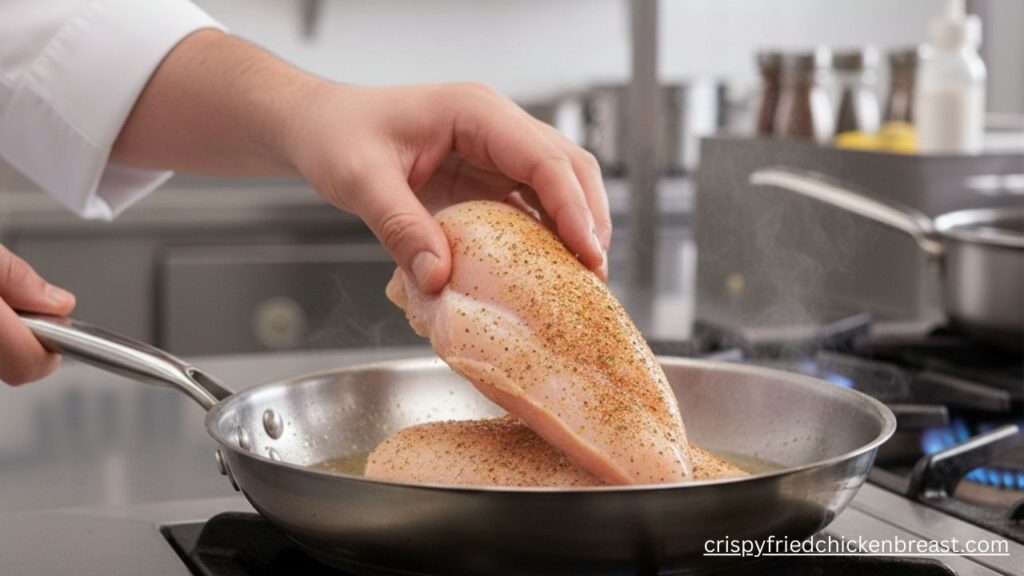
- Don’t Touch It! Let it cook undisturbed for 5–6 minutes. This builds the “crust.” If you try to flip it and it sticks, it’s not ready yet.
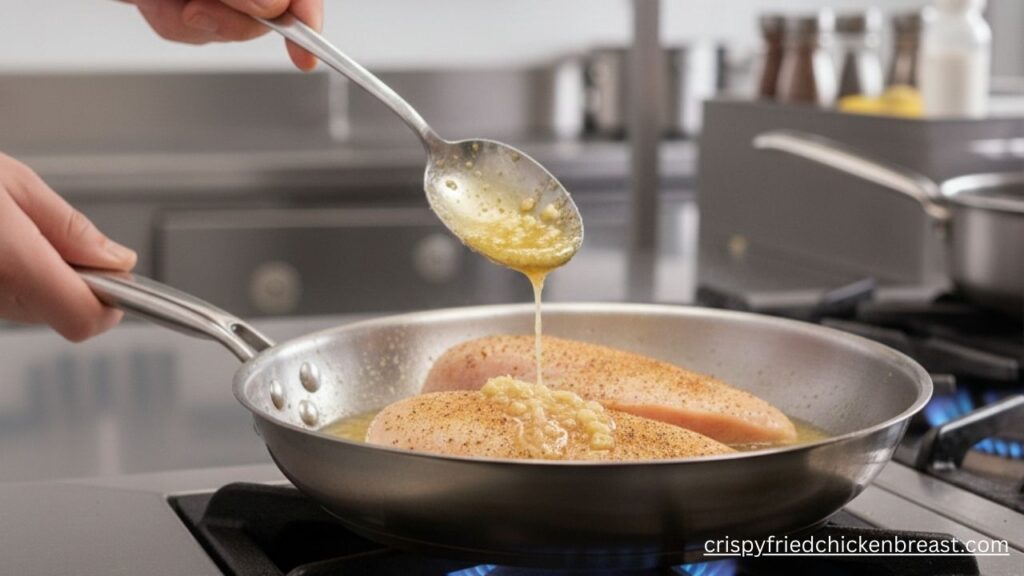
Step 5: Flip and Baste
Flip the chicken. It should be beautifully golden. Lower the heat to medium.
Now, add the butter and crushed garlic to the pan. As the butter melts and foams, tilt the pan slightly and use a spoon to pour that hot garlic butter over the chicken repeatedly. This is called basting, and it’s the secret to juicy meat.
Step 6: The Temperature Test
Cook for another 4–5 minutes. The best way to be sure is using a meat thermometer. Pull the chicken out when the internal temperature reaches 160°F (71°C). It will rise to the safe 165°F while resting.

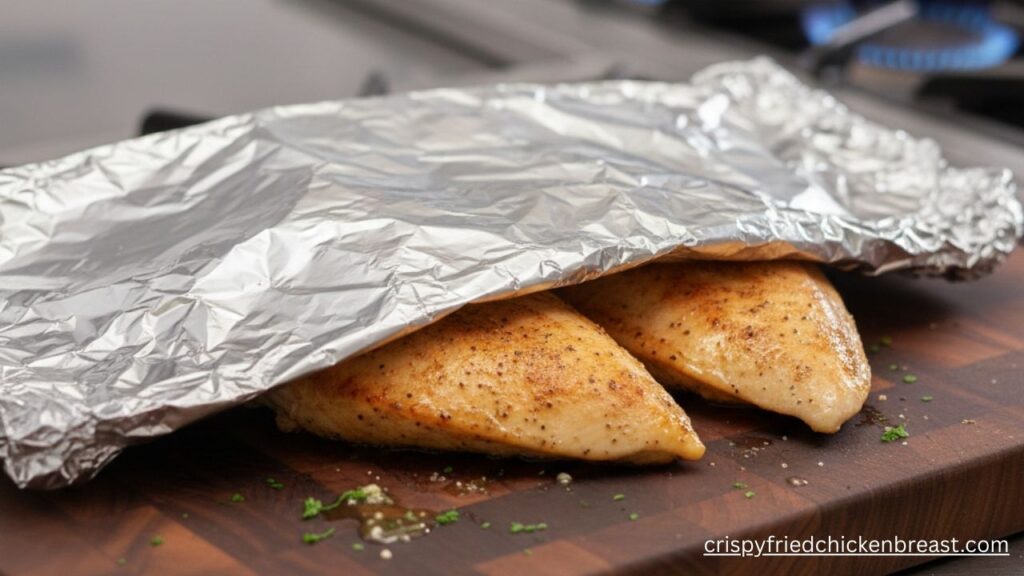
The Golden Rule: Let It Rest!
This is where most home cooks fail. If you cut the chicken immediately, all the juices will run out on the board, leaving the meat dry.
Transfer the chicken to a plate, cover loosely with foil, and wait 5–10 minutes. This allows the muscle fibers to relax and reabsorb the juices.
Pro-Tips for the Perfect Chicken Every Time
- Room Temperature: Never cook chicken straight from the fridge. Let it sit out for 15 minutes to take the chill off. This ensures it cooks evenly.
- Don’t Overcrowd the Pan: If you are cooking 4 breasts, use a very large skillet or cook in batches. Crowding lowers the pan temperature and creates steam.
- Use Cast Iron: If you have a cast-iron skillet, use it! It holds heat better than non-stick pans and gives a superior crust.
Variations: One Recipe, Five Flavors
Once you master this method, you can change the seasoning to suit any cuisine:
- Taco Style: Use Cumin, Chili Powder, and Lime juice.
- Italian: Use Italian seasoning and finish with a squeeze of Lemon and Parmesan cheese.
- Lemon Pepper: Heavy on the cracked black pepper and fresh lemon zest.
- BBQ: Brush with your favorite BBQ sauce in the last 2 minutes of cooking.
- Honey Garlic: Add 1 tbsp of honey to your garlic butter at the end for a sweet glaze.

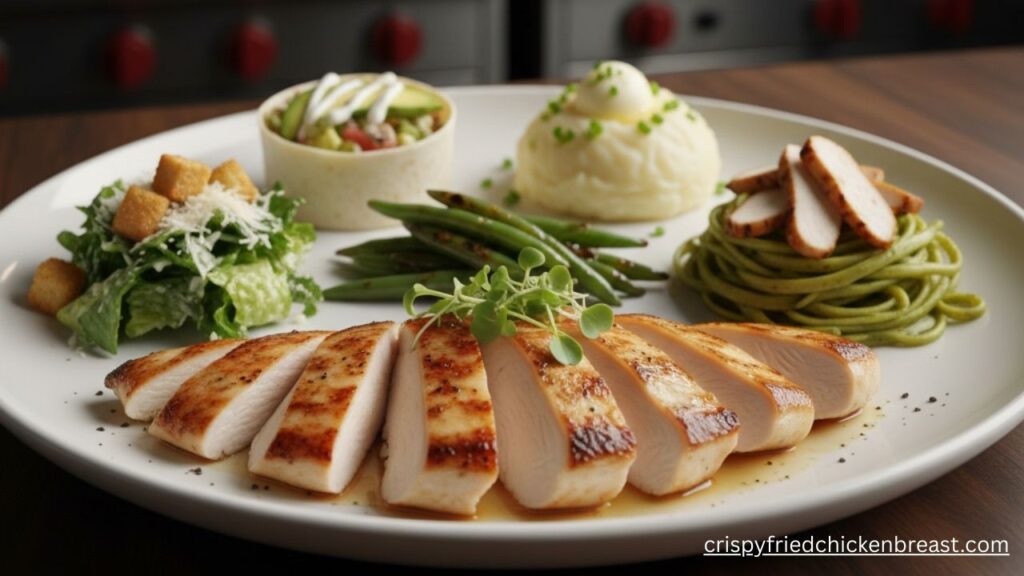
Serving Suggestions: What to Pair with Your Chicken
This chicken is a blank canvas. Here are some winning combinations:
- The Healthy Choice: Serve over a bed of fresh Caesar Salad or a Quinoa Grain Bowl.
- The Comfort Meal: Pair with creamy Mashed Potatoes and steamed Broccoli.
- The Quick Lunch: Slice it up and put it inside a wrap with avocado and ranch dressing.
- The Pasta Night: Slice and place on top of Fettuccine Alfredo or Pesto Pasta.
Storage and Reheating Guide
How to Store:
Keep leftovers in an airtight container in the fridge for up to 3–4 days. You can also freeze cooked chicken for up to 3 months in freezer-safe bags.
How to Reheat (Without Drying Out):
- Avoid the Microwave if possible. It makes chicken rubbery.
- Best Method: Place the chicken in a skillet with 2 tablespoons of water or chicken broth. Cover with a lid and heat on low for 3–5 minutes. The steam will keep it moist!
Frequently Asked Questions (FAQs)
Q: Can I use chicken thighs instead?
A: Yes! Chicken thighs are even juicier because they have more fat. Cook them for about 2–3 minutes longer than breasts.
Q: Why is my seasoning burning?
A: If your spices are burning before the chicken is cooked, your heat is too high. Switch to medium heat and add a little more oil.
Q: Do I need to flour the chicken?
A: Not for this recipe. We are doing a “naked” sear which is healthier and gluten-free. However, a light dusting of flour can add extra crunch if you prefer.
Conclusion
Making the perfect Pan-Fried Chicken Breast isn’t about luck; it’s about technique. By pounding the meat evenly, patting it dry, and allowing it to rest, you are guaranteed a meal that is light-years ahead of the typical dry chicken breast.
Give this recipe a try tonight! If you loved it, don’t forget to leave a 5-star rating and tell us in the comments what side dish you paired it with.
-
Authentic Karachi-Style Spicy Mutton or Lamb Biryani Recipe
Karachi’s biryani is renowned worldwide for its bold spiciness and rich flavors. What sets Karachi-style biryani apart is its unique […]
-
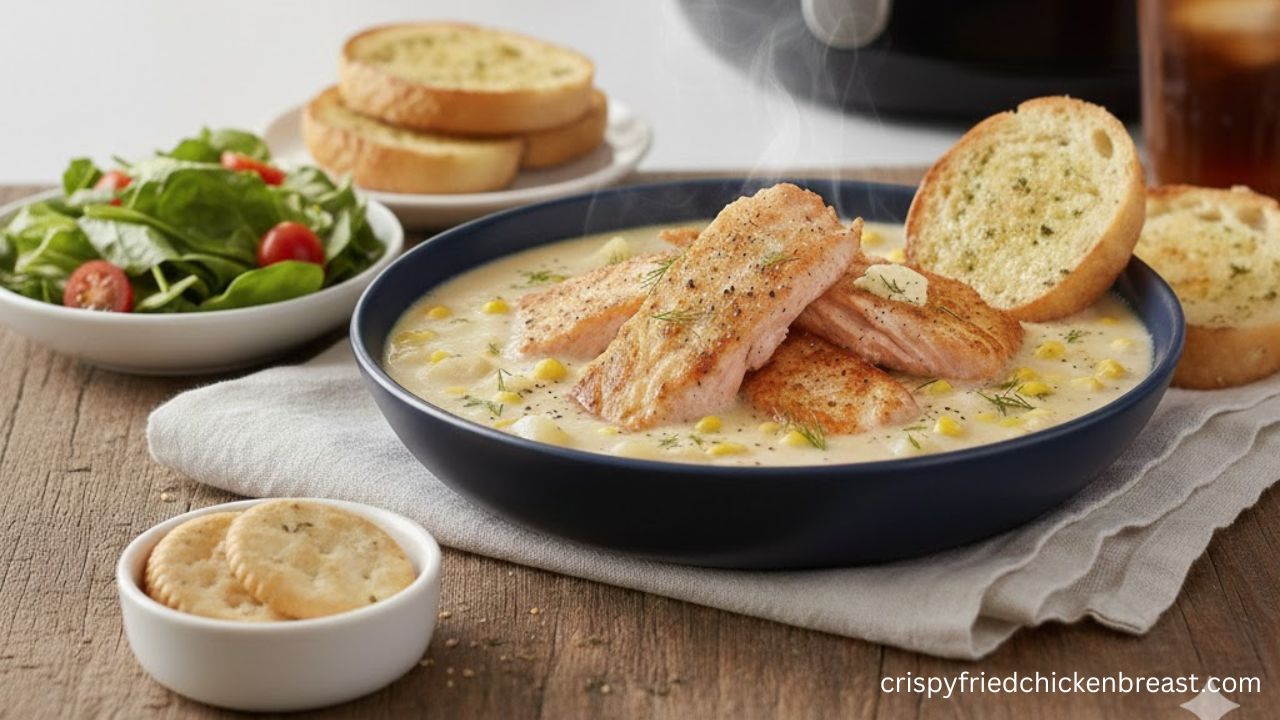
Easy Air Fryer Fish Chowder: The Best 20-Minute Comfort Food
American food is all about comfort. When you think of a cold evening in New England or a family dinner […]
-
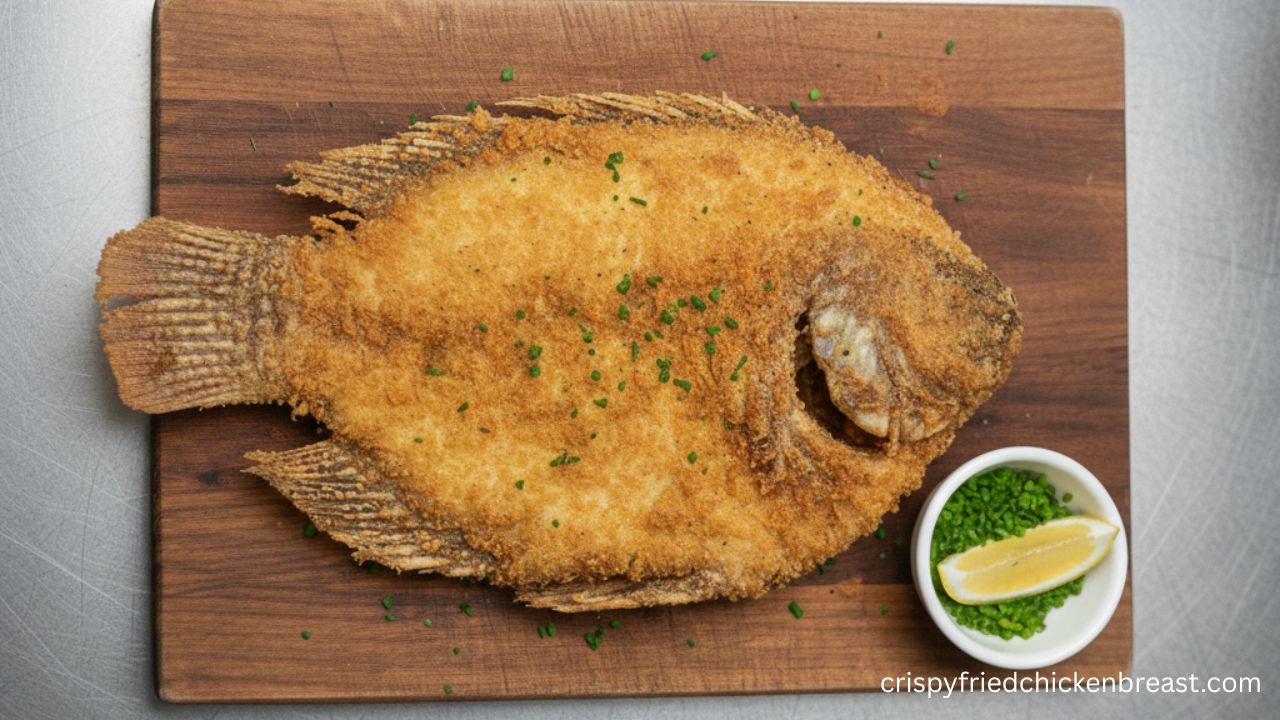
Crispy Fried Tilapia Recipe (Easy, Golden & Crunchy Fish)
Crispy Fried Tilapia is one of the easiest and most loved fish recipes in the United States. It is known […]
Author

Perfect Pan-Fried Chicken Breast: Juicy, Golden, and Ready in 15 Minutes

Stop eating dry chicken! Master our 15-minute pan-searing technique for juicy, golden-brown results every time. Perfect for quick dinners and easy meal prep.
Recipe Ingredients: