There’s something magical about a lamb shoulder. Unlike the lean leg of lamb, the shoulder is marbled with fat and connective tissue. When you cook it “low and slow,” that tough exterior transforms into a buttery, fall-off-the-bone masterpiece.
Whether you are a seasoned home chef or a beginner who just bought a Dutch oven on a whim, this guide is for you. We’ve combined professional browning techniques, the secret to the perfect “crispy finish,” and a rich red wine braise to create the only lamb recipe you’ll ever need.

Why Lamb Shoulder? (The Secret to Flavor)
Most people shy away from the shoulder because it looks “tough.” But here is the secret: Fat equals flavor. Lamb shoulder is a hard-working muscle. This means it needs time to break down. When braised (cooked slowly in liquid), the collagen melts into gelatin, making the meat incredibly juicy. It’s also much more forgiving than other cuts-it’s almost impossible to overcook if you have enough liquid!
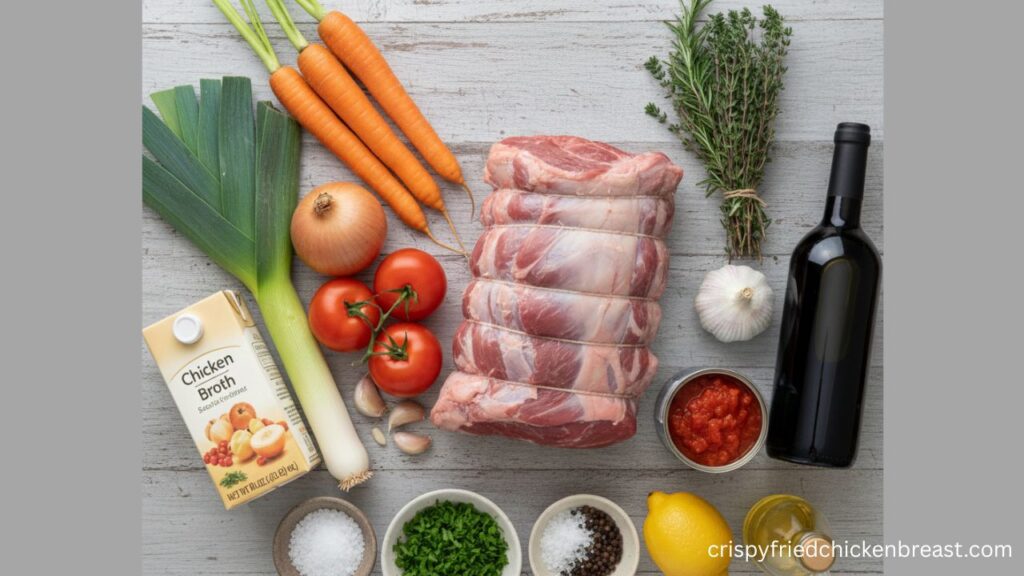
The Grocery List: Everything You Need
The Star of the Show
- 3-4 lbs Lamb Shoulder: You can use bone-in (for more flavor) or boneless (for easier slicing). If boneless, ensure it is tied with butcher’s twine so it doesn’t fall apart.
The “Aromatics” (The Flavor Base)
- Vegetables: 2 large carrots, 2 stalks of celery, 1 large onion, and 1 leek.
- Garlic: 1 whole head (cut in half) plus 3-4 cloves minced.
- Tomatoes: 2 fresh tomatoes or 1 small can of diced tomatoes (adds acidity to cut through the fat).
The Braising Liquid
- 2 cups Chicken or Beef Broth: Low sodium is best.
- 1-2 cups Red Wine: Use a dry wine like Cabernet Sauvignon or Malbec. (If you don’t use alcohol, replace with more broth and a tablespoon of balsamic vinegar).
Herbs & Extras
- Fresh Herbs: Rosemary, Thyme, and Parsley.
- Lemon: For zest (crucial for the “Gremolata” finish).
- Pantry Staples: Salt, black peppercorns, and high-heat oil (Canola or Grapeseed).
How To Make Braised Lamb Shoulder Step-by-Step
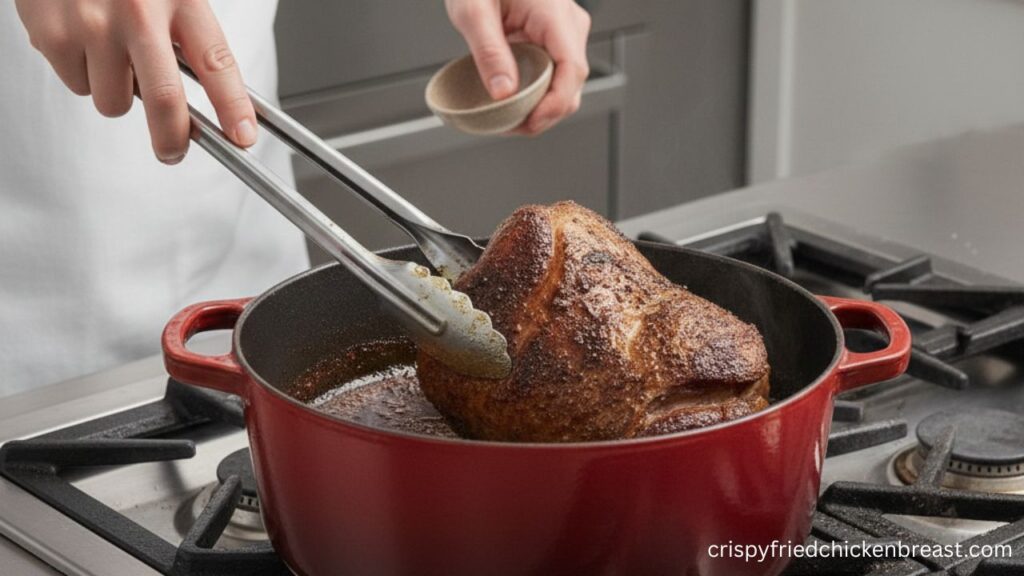
Step 1: The “Dry Brine” (The Professional’s Secret)
If you have time, salt your lamb 24 hours in advance. This is called dry brining. It allows the salt to penetrate deep into the muscle fibers, seasoning the meat from the inside out, not just on the surface.
Pro Tip: Pat the meat bone-dry with paper towels before cooking. Moisture is the enemy of a good crust.

Step 2: The Sear (Building the Foundation)
Place your Dutch oven or a heavy skillet over medium-high heat with a splash of oil. Once the pan is “shimmering” hot, sear the lamb.
Don’t rush this! Give it 3–5 minutes per side until it develops a deep, dark brown crust. This is the Maillard reaction, and it’s where all the savory flavor comes from. Once browned, remove the lamb and set it aside.
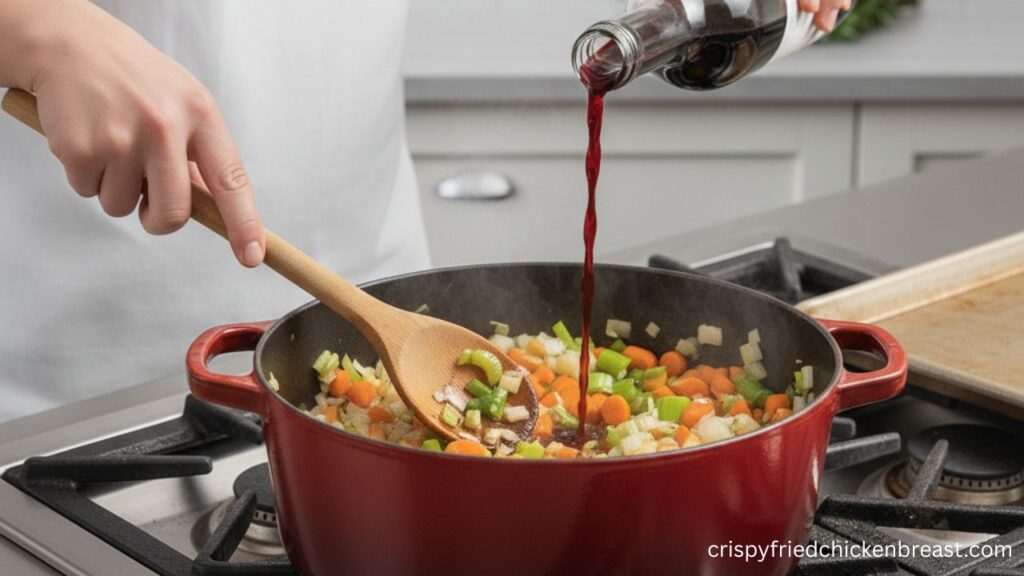
Step 3: Sauté and Deglaze
In the same pan (don’t wash it!), throw in your chopped carrots, onions, celery, and leeks.
- The Brown Bits: You’ll see dark spots stuck to the bottom of the pan. That is “fond” (liquid gold).
- Deglazing: Pour in your wine. Use a wooden spoon to scrape those brown bits off the bottom as the wine bubbles. This incorporates all that roasted meat flavor into your sauce.
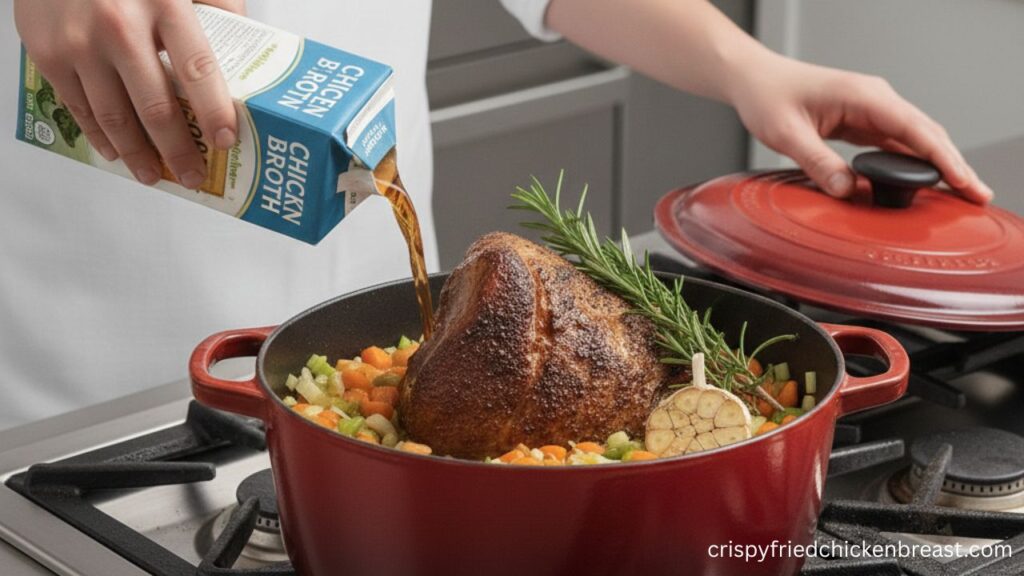
Step 4: The Low and Slow Braise
- Preheat your oven to 300°F (150°C).
- Place the lamb back into the pot on top of the vegetables.
- Pour in your broth until the liquid comes about halfway up the side of the meat.
- Add your bundle of herbs (Rosemary and Thyme) and the halved head of garlic.
- Cover with a tight lid. If your lid is a bit loose, put a layer of aluminum foil over the pot first, then the lid.
How long? Usually 3 to 4 hours. Start checking at the 3-hour mark. If a fork slides into the meat and twists easily, it’s ready.
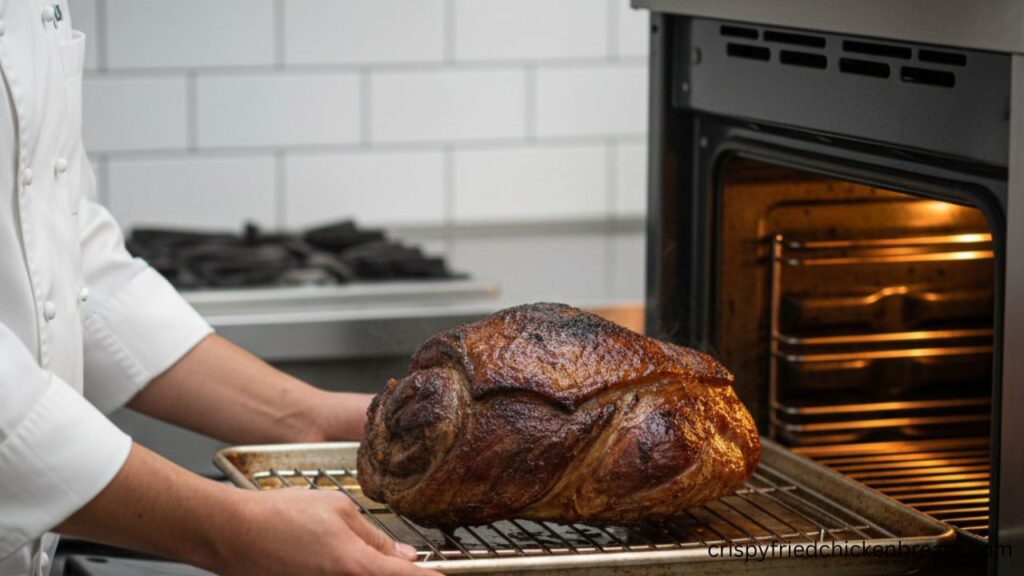
Step 5: The “Crispy Perfection” Finish
Most recipes stop at the braise, but we want texture! While the meat rests for 20 minutes, you have two options for that “Goddamned Meat Perfection” crust:
- The Grill Option: Place the tender lamb on a hot charcoal or gas grill for 2 minutes per side. It will char the outside while keeping the inside succulent.
- The Oven Option: Crank your oven to 450°F (230°C). Put the lamb on a baking sheet and roast for 10 minutes until the fat turns crispy and golden.
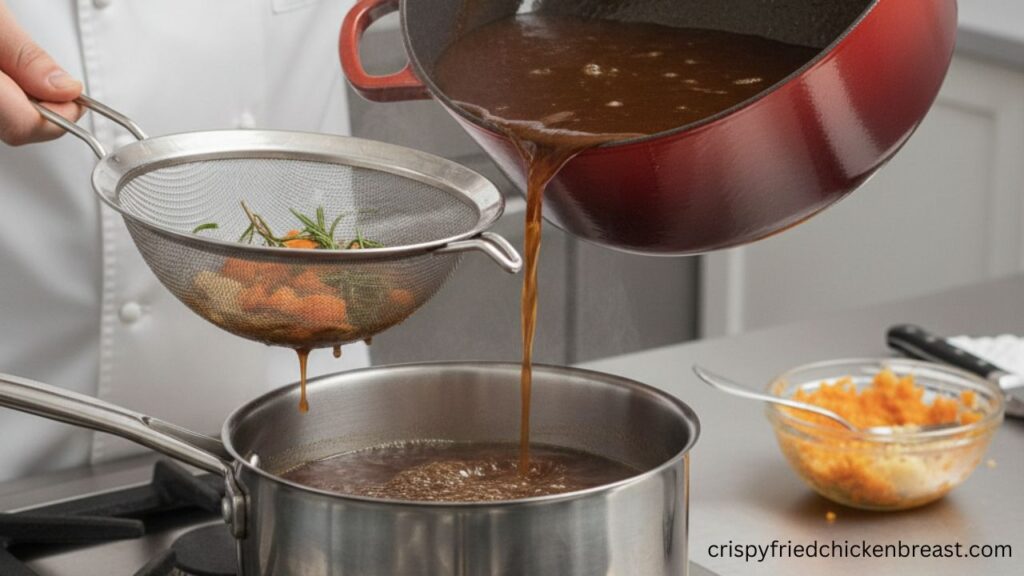
Step 6: The “Better-Than-Gravy” Sauce
While the lamb is getting crispy, look at the liquid left in your pot.
- Strain it: Pour the liquid through a mesh strainer into a saucepan. Discard the mushy herb stems.
- Reduce it: Simmer the liquid on high heat for 10 minutes until it thickens.
- The Secret Tip: Take a few of the braised carrots and a bit of the garlic you cooked, mash them into a paste, and whisk them back into the sauce. It adds incredible body and sweetness without needing flour.
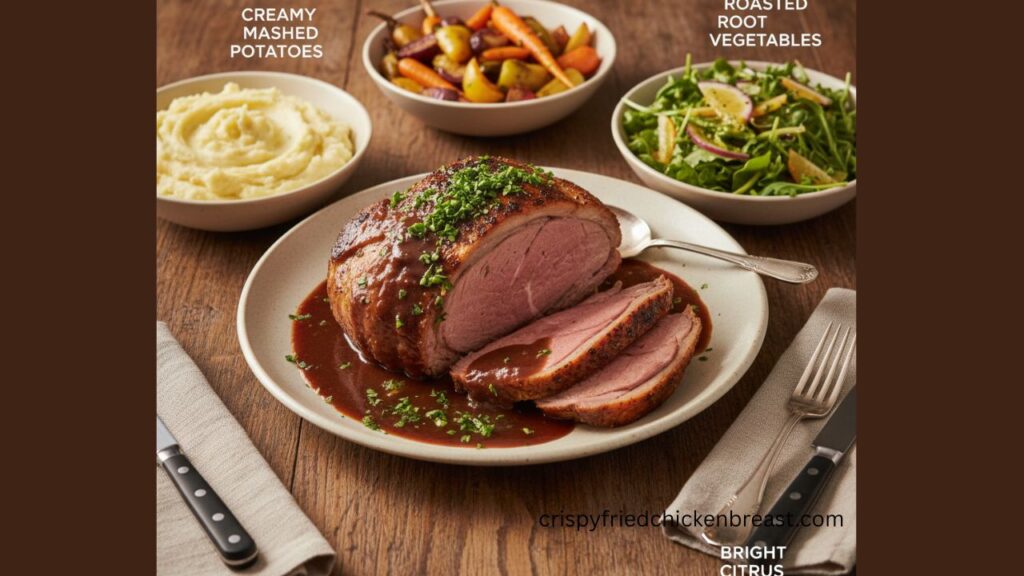
The Final Touch: Fresh Gremolata
To balance the richness of the lamb, top it with a Gremolata.
- Mix: Chopped parsley, 1 clove of minced garlic, and fresh lemon zest.
Sprinkle this over the meat right before serving. The zing of the lemon and the freshness of the parsley cut right through the heavy fat, making every bite feel light.
Frequently Asked Questions FAQ’s
Should I use bone-in or boneless lamb shoulder?
Both work well, but bone-in is highly recommended for maximum flavor, as the bone releases marrow that enriches the sauce. If you choose boneless, make sure it is tightly tied with butcher’s twine so it holds its shape during the long cooking process.
Can I make this in a Slow Cooker or Crockpot?
Yes! For the best results, sear the meat and deglaze the pan with wine first to lock in the flavor. Then, transfer everything to your slow cooker and cook on “Low” for 8–9 hours. It will be incredibly tender and effortless.
What is the best substitute for red wine? If you prefer not to use alcohol, replace the wine with an equal amount of beef or chicken broth and add one tablespoon of Balsamic vinegar. The vinegar provides the necessary acidity to cut through the richness of the lamb fat.
How much braising liquid is actually needed?
The liquid should only come about halfway up the sides of the lamb. You don’t want to submerge the meat completely; keeping the top exposed helps develop a better crust and ensures the meat braises (steams/slow cooks) rather than just boiling.
How do I know exactly when the lamb is done? The most reliable method is the “Fork Test.” Insert a fork into the thickest part of the meat and give it a gentle twist. If the meat pulls apart with zero resistance and falls off the bone easily, it is perfectly cooked and ready to rest.
-
Authentic Karachi-Style Spicy Mutton or Lamb Biryani Recipe
Karachi’s biryani is renowned worldwide for its bold spiciness and rich flavors. What sets Karachi-style biryani apart is its unique […]
-
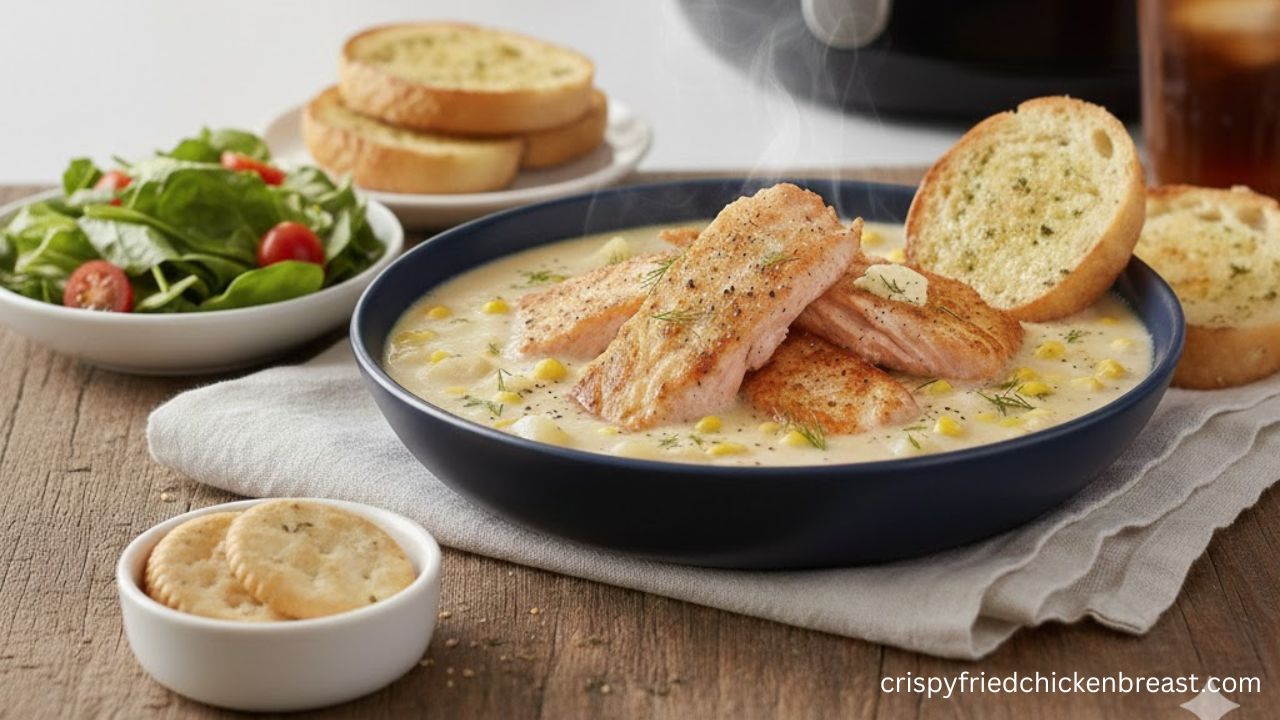
Easy Air Fryer Fish Chowder: The Best 20-Minute Comfort Food
American food is all about comfort. When you think of a cold evening in New England or a family dinner […]
-
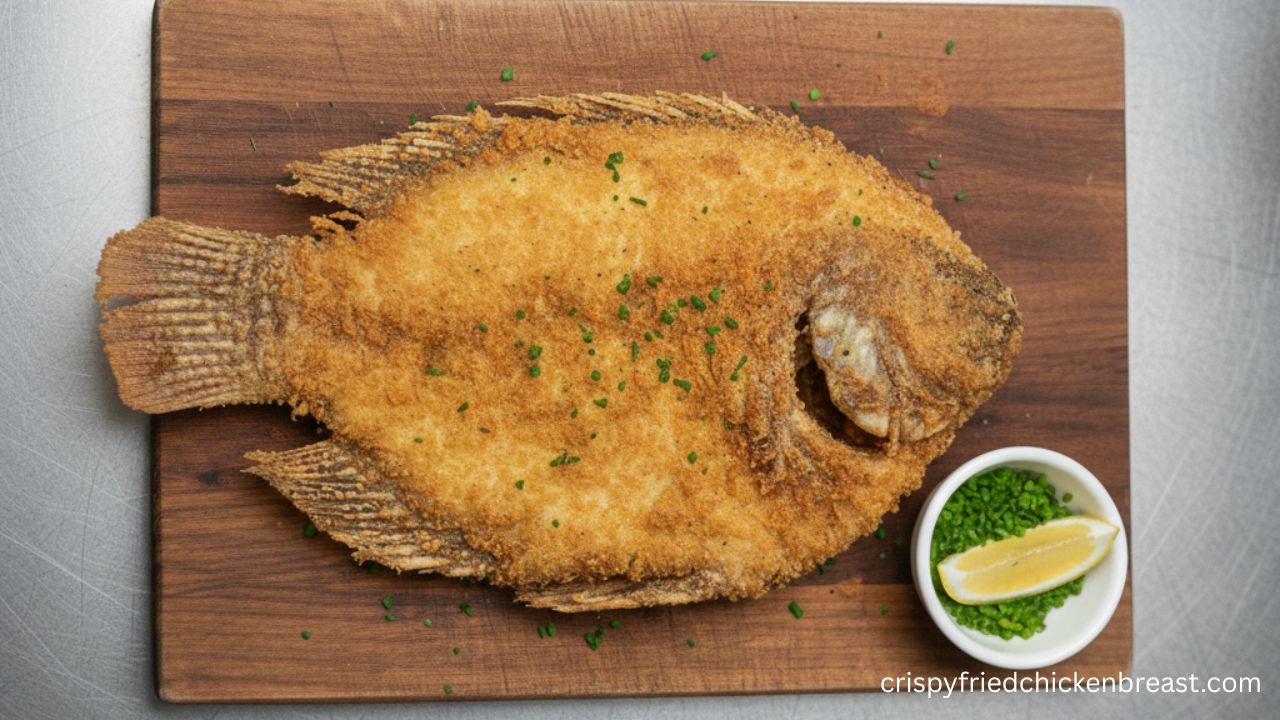
Crispy Fried Tilapia Recipe (Easy, Golden & Crunchy Fish)
Crispy Fried Tilapia is one of the easiest and most loved fish recipes in the United States. It is known […]
Author

Melt-in-Your-Mouth Braised Lamb Shoulder: Crispy, Juicy, & Foolproof
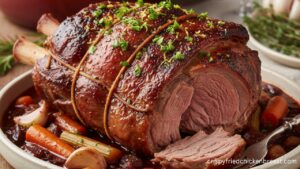
Master the art of Braised Lamb Shoulder with our foolproof guide. Learn secret searing techniques for crispy and rich red wine braise for melt-in-your-mouth perfection.
Recipe Ingredients: